To populate the BCF Live view with issues from the project, you need to turn on the Live Sync. When you turn on the Live Sync, you're prompted to select a server and project. When you have established the connection, the issues will be synchronised from the issue management platform. When the Live Sync is on, any issues you import from Solibri will be synchronized automatically.
The synchronization status is shown in the leftmost column. When the synchronization is ongoing, the status icon is  . When the synchronization is complete, the icon is
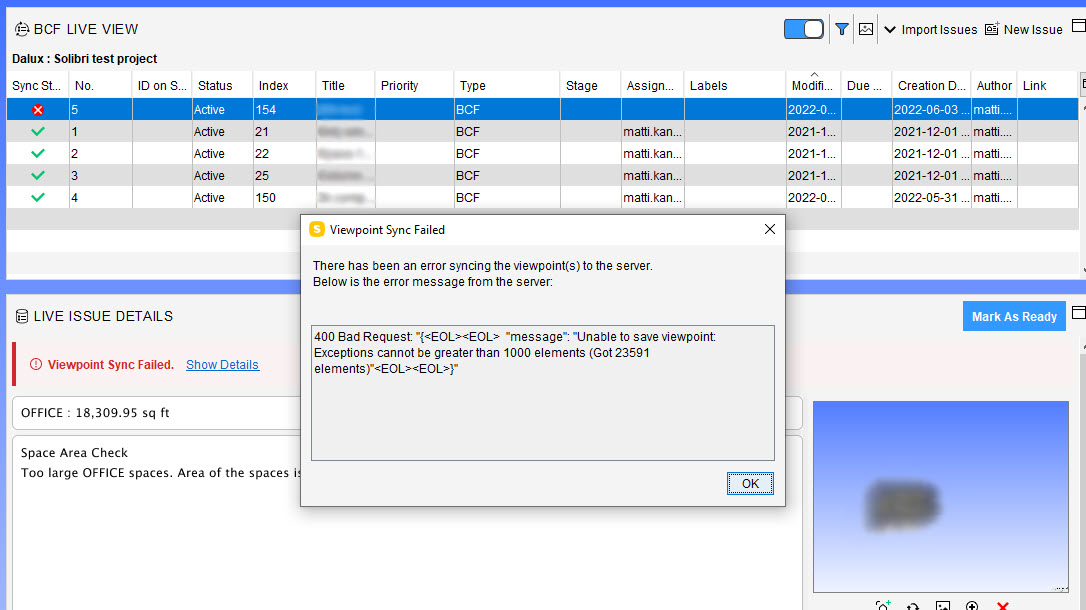
  . If there's a problem with synchronizing the issue to the server, the icon
  will be shown in the live issue list. These problems include, for example:
-
Missing issue title
-
Server timeout
-
Connection error
-
Other limitation on the BCF server side (for example, a limitation on the number of components included in a viewpoint)
Note
From version 9.12.10 onward, Solibri will display a warning when a viewpoint sync error is detected. When an issue has been updated, the row is highlighted using bold text:
This article covers the following topics:
Remember to End Your Session
Once you are done working with your BCF Live project, remember to end the session and turn off the sync. This will clear the synched issues from the list. To retain links to checking results or local issues which have been added to the BCF Live view, save your model.
If you're closing a model while connected to a BCF Live project, a dialog reminding you to close the connection will appear:
 |
To end the session, click Close connection. If you wish to continue with the same project, click Remain connected.
To turn on the Live Synch, toggle the button on in the BCF Live view toolbar:
 |
When you turn on the Live Sync, you are prompted to select a server and a project.
-
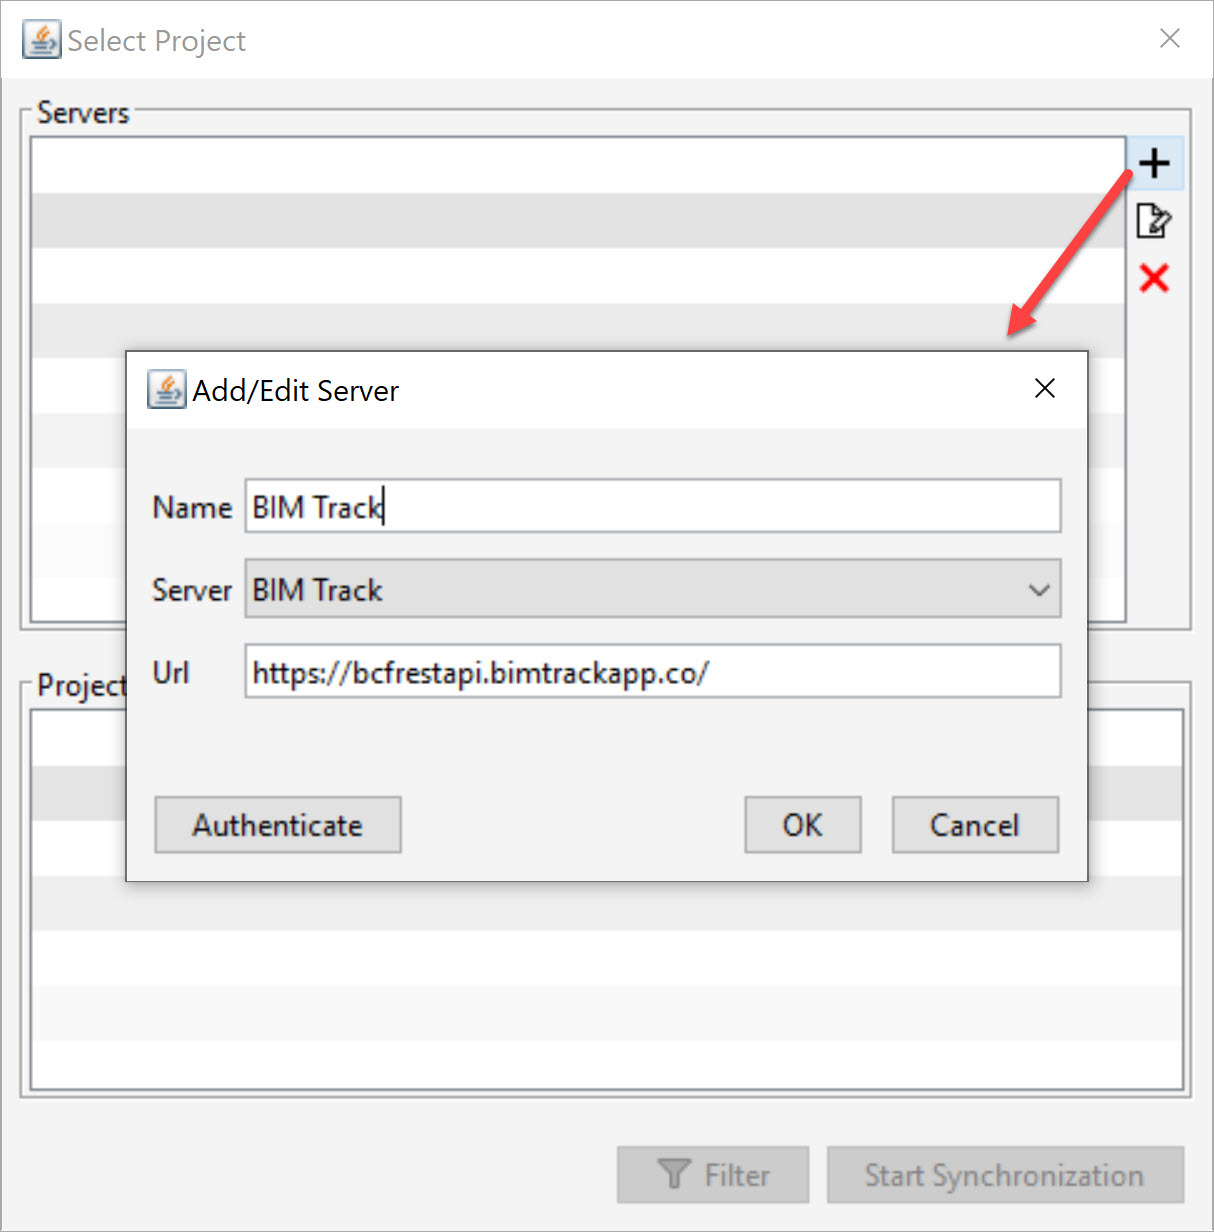
To add a server, click
 . A dialog opens. Select the server from the drop-down list and enter a name for the server. Click Authenticate:
-
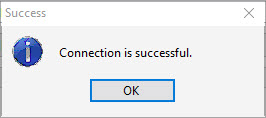
A browser window opens and you are requested to login to the server to authenticate the connection. Once the connection has been verified, a dialog opens. Click OK:
-
To close the Add Server dialog, click OK.
-
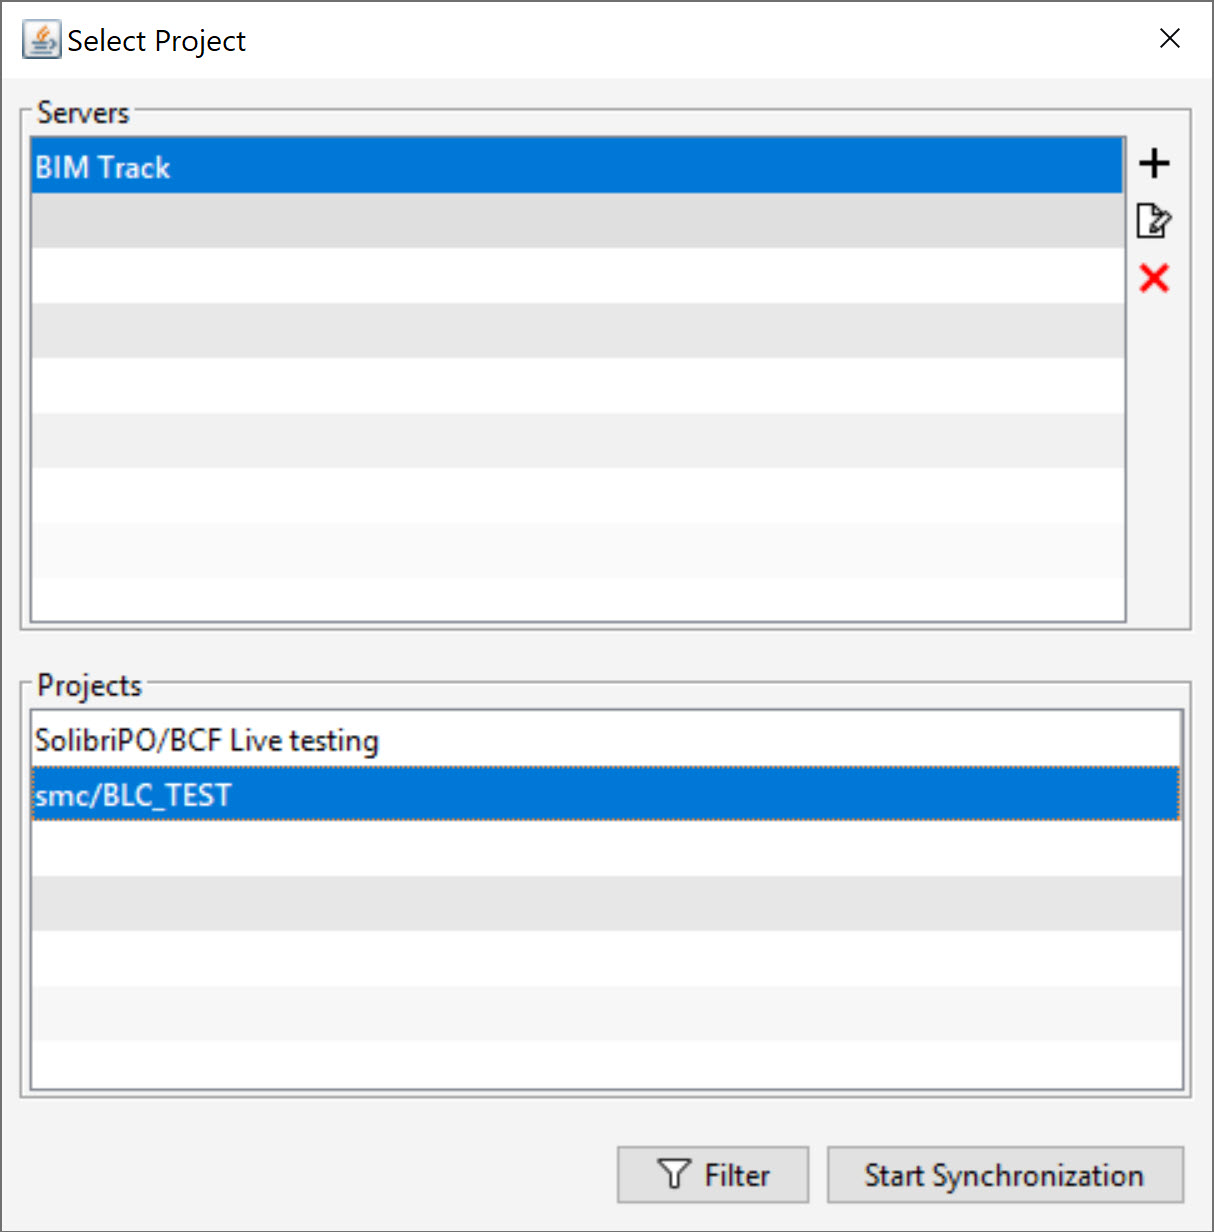
You can add multiple servers to the list, but only one can be selected at a time. When you select the server from the list, the projects are listed under Projects.
Select the project you wish to synchronise:
-
To start the live synchronisation, click Start Synchronization. The live synchronisation starts and the issues on the server are shown in the BCF Live view.
When you have established the connection, you have the possibility to filter issues before synchronization. In this way, you don't have to upload all the issues from a project, and can instead select specific issues only:
-
In the Select Project dialog, click Filter:

-
A dialog opens:
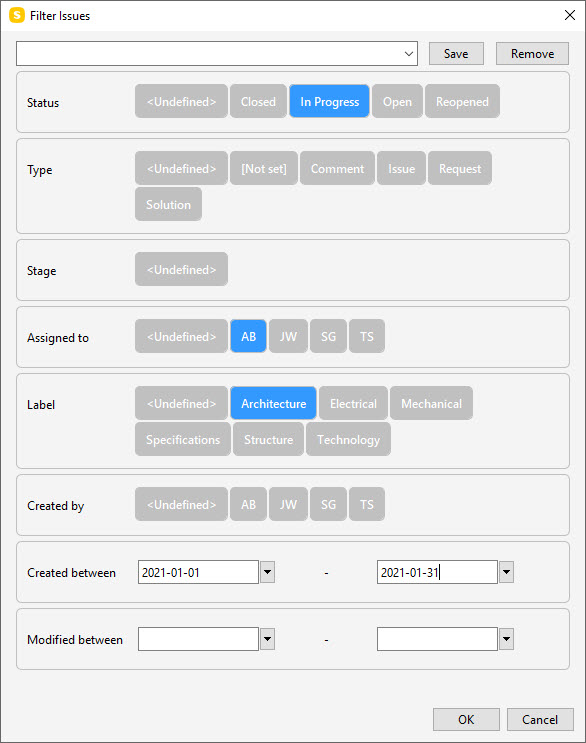
When you activate a filter, it turns from grey to blue. You can select one or multiple filters. You can filter the issues by status, type, stage, assignment, label and creator.
If the Assigned to filter has a long list of assignees, a search field appears and you can search for a specific assignee.
-
Click OK and then Start Synchronization.
Tip
You can save a filter and use it later. To save a filter, insert a name and click Save:
 |
If you wish to use a filter you have previously saved, select it from the drop-down menu:
 |