In Part 5 of this tutorial series, we will refine the other ruleset created in the previous parts and introduce the concept of gatekeeper functionality in rules.
In this tutorial, you will refine the second ruleset you created, My Second Ruleset, to create a gatekeeper rule allowing one set of results to be filtered and passed to a sub-rule.
This tutorial covers the following topics:
Note
The video related to this tutorial article can be found here.
Let's start the tutorial by refining My Second Ruleset:
-
Open the Rulesets model created in the previous tutorials.
-
Go to the Checking layout and look at My Second Ruleset in the Checking view. You can see that it contains two rules within the Building Envelope Checks folder:

-
External/internal status should be defined, which checks that the status of the parameter Pset_DoorCommon.Isexternal is defined. Although doors may have the parameter, it doesn't automatically mean that the value is set correctly (assigned to the doors in the right context).
-
Doors Must Be Connected to Two Spaces, which checks that doors are related to two spaces
-
-
To view the checking results, click Check Model.
-
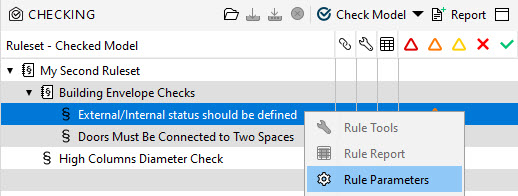
In the Checking view, select the External/Internal status should be defined rule. Right click the rule and select Rule Parameters from the context menu.
-
From the filter in the rule, you can see that it checks walls, curtain walls, slabs, windows, doors, and stairs:

Each of these components has its own version of the Pset_*Common.IsExternal property, such as Pset_WallCommon.IsExternal or Pset_DoorCommon.IsExternal:

Important
Choosing a specific version of the Pset_Common.Isexternal properties from the model would prevent checking all elements at the same time. This would result in the requirement writing and running an individual rule for each component type.
-
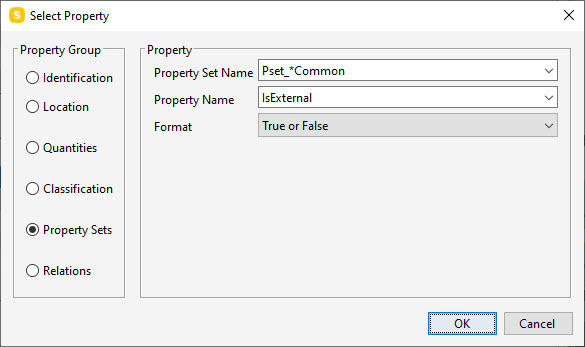
To see how the wildcard (*) is set up for the Property field in the requirements, click the Property cell and then click
 . A dialog opens:
-
From the Property Set Name drop-down menu, select Pset_DoorCommon:

-
Edit the Property Set Name by replacing Door with an asterisk wildcard (*):

-
As we have changed the Property Set Name to one that doesn't exist, it's not possible to select isExternal from the Property Name drop down menu:

Therefore, type IsExternal for the Property Name:

-
To close the dialog, click OK.
-
Change the operator to = and the value to True:

-
Close the Parameters view and check the operation of this edited rule by clicking Check Model.
Originally, the rule checked that the components that conformed to the filter had the Property Set defined. Now, the rule checks that this value is = true for any element that passes the filter. This rule can now be used to filter and identify external and internal doors.
The other rule in My Second Ruleset checks that doors are related to two spaces. This creates failed issue conditions for doors that are only related to one space. We can use these elements in a sub-rule to subsequently check that they have a value that is = True.
Next, we'll create a condition for external doors:
-
Go to Ruleset Manager.
-
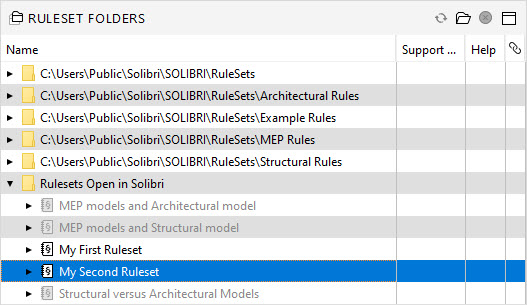
In the Ruleset Folders view, open the Rulesets Open in Solibri folder and select My Second Ruleset:
-
In the Workspace view, click
 :
:
-
To ensure that the name of the rule matches its functionality, select the External/internal status should be defined rule and rename this to External/Internal status should = True:

-
In the Workspace view, click the Building Envelope Checks ruleset. To create a new ruleset folder under it, click
 in the Workspace view toolbar:
-
Select the new ruleset folder and rename it to Door Position Check.
-
Drag the External/Internal status should = True and the Doors Must Be Connected to Two Spaces rule into the Door Position Check folder:

-
Change the name of the Doors Must Be Connected to Two Spacesr ule to Identification of External Doors.
We will use the Identification of External Doors rule to filter the failed results and push them to the sub-rule.
-
Drag the External/Internal Status should = True rule on top of the Identification of External Doors rule:

-
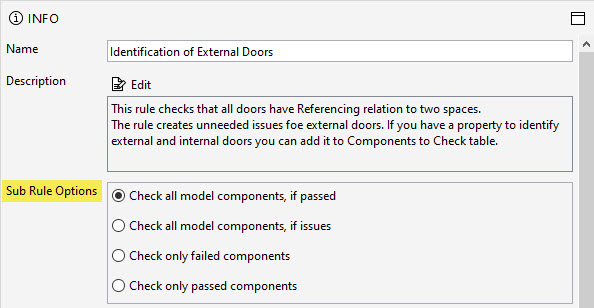
When you select the parent rule (Identification of External Doors), you can now see the Sub Rule Options in the Info view:
-
To process only the failed components to the subrule, select Check only failed Components from the sub rule options:

Now, the sub rule doesn't need to filter the types of components, for only doors will be passed to it.
-
Return to the Checking layout and review the changes by clicking Check Model.
When looking at the results, you can see that the subrule has passed:
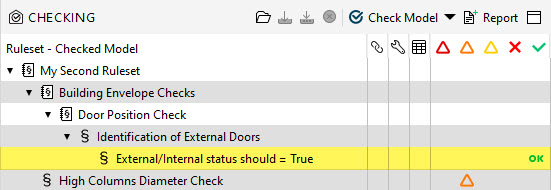

Although the parent rule evaluates and produces a set of checked components, passed and failed conditions, it does not create physical issues as before for failures. It acts as a conduit delivering the components as specified in the sub rule options.
In this example, the results being listed as OK tell us that all of the doors identified as 'external' (as they are connected to only one space) have their Pset_DoorCommon.IsExternal correctly defined as True.
-
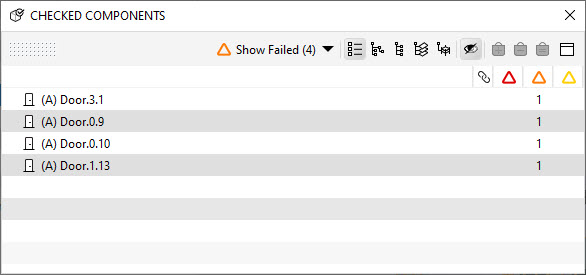
To evaluate the results of the parent rule, select the Identification of External Doors rule in the Checking view and click
 in the Result Summary view toolbar. This opens the Checked Components view:
-
To view the the checked, passed and failed components, select from the drop-down menu:
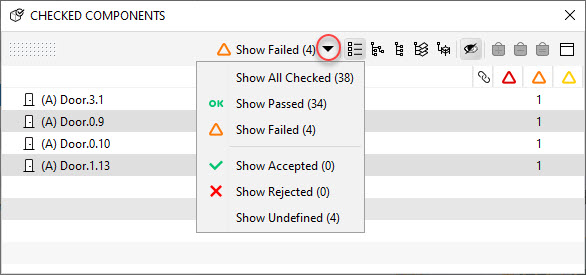
You can see for the parent rule, its checked 38 components, passed 34 and failed 4.
-
In the Checking view, select the sub rule External/Internal Status should = True. You can see that only four doors are passed to the rule and they all have the correct value of True for the Pset_DoorCommon.IsExternal parameter:
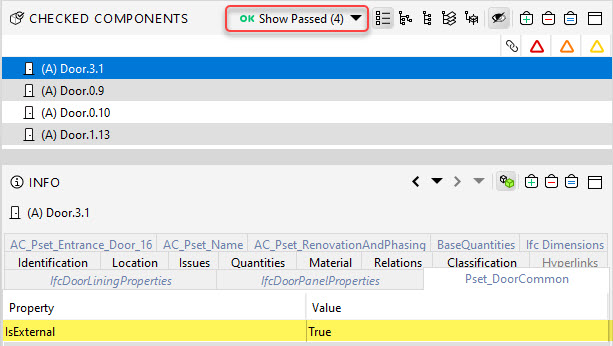
The Checked Components view is useful in evaluating any rule to ensure that it is behaving as expected.
There may be times when you need to create issues at the parent rule level. A quick method to achieve this is to copy the parent rule that contains the subrule, remove the subrule from the upper copy, then manipulate the descriptions to help users understand the logic.
Important
Gatekeeper rules will only continue to be displayed after the checking process has been evaluated if components that are required of the rules are present in the model. If the model does not meet the criteria of the filter for the parent rule, then this and the subrules will not be shown in the checking interface.
To see an example of this explained in the tutorial video, click here.
Last, we're going to view the results of the gatekeeper (parent) rule:
-
Go to Ruleset Manager.
-
In the Workspace view, right-click the Identification of External Doors rule and select Copy from the context menu.
-
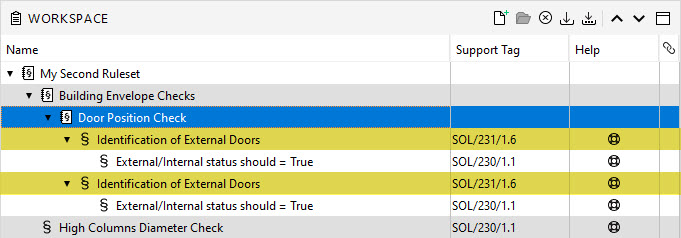
Right-click the Door Position Check ruleset folder and select Paste from the context menu. You now have two copies of the gatekeeper rules:
-
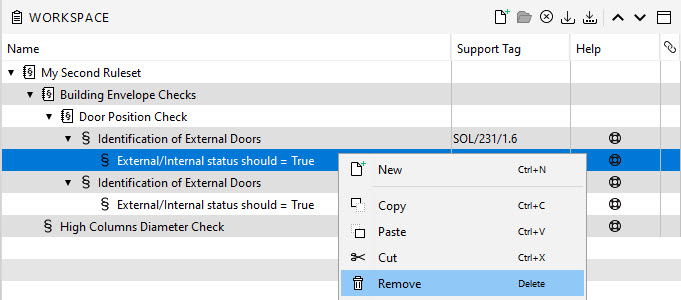
Remove the subrule from the upper version. Right-click the External/Internal status should = True rule and select Remove from the context menu:
-
You can now rename the copy of the rule to Doors Should be Connected to Two Spaces:

-
Save your ruleset by clicking
 in the Workspace view toolbar.
 -
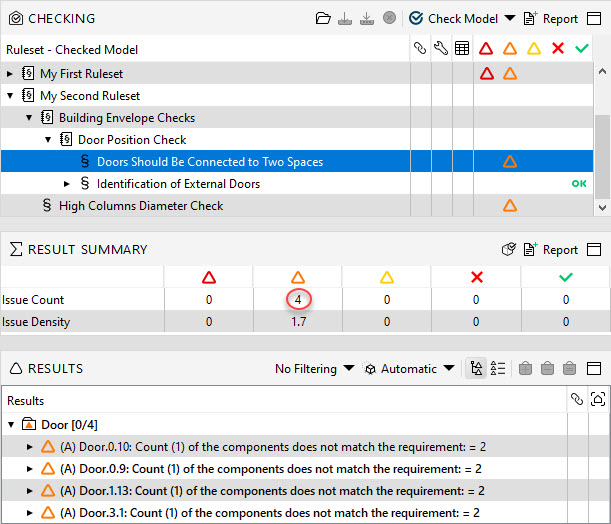
Return to the Checking layout and re-check the model. Now you will see the failed doors, i.e. the ones that are only connected to one space:
Important
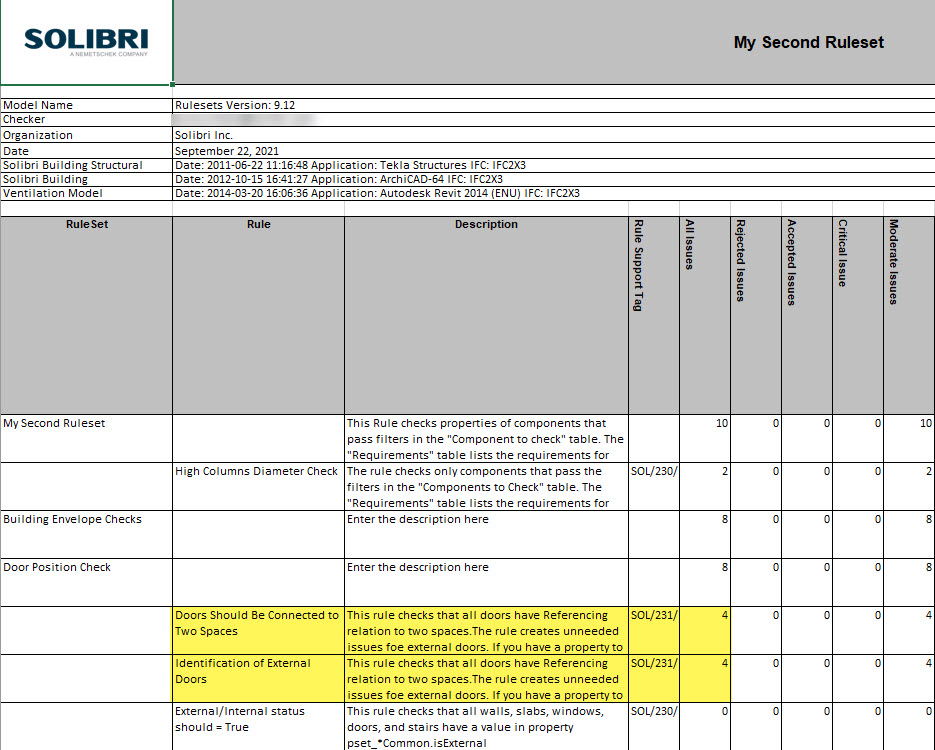
Please be aware if you are using the Results Summary report this will duplicate data for this entry:
-
Save your model.
