In the first part of this tutorial series, you successfully created your first ruleset, which was based on the General Intersections Rule.
In this second part, we'll introduce the process of manipulating existing rulesets, allowing you to extend them with additional new rules, or, as in our example, by utilising rules from existing rulesets.
Note
The video related to this tutorial article can be found here.
This tutorial consists of three parts:
First, you need to open a model and load an additional ruleset to the Checking layout:
Open the model named Rulesets.smc, which you created in the previous tutorial.
Go to the Checking layout. Close the to-do list, if it appears.
To add rulesets, click
 in the Checking view toolbar. The dialogue offers additional resources from the current role that you may want to load.
-
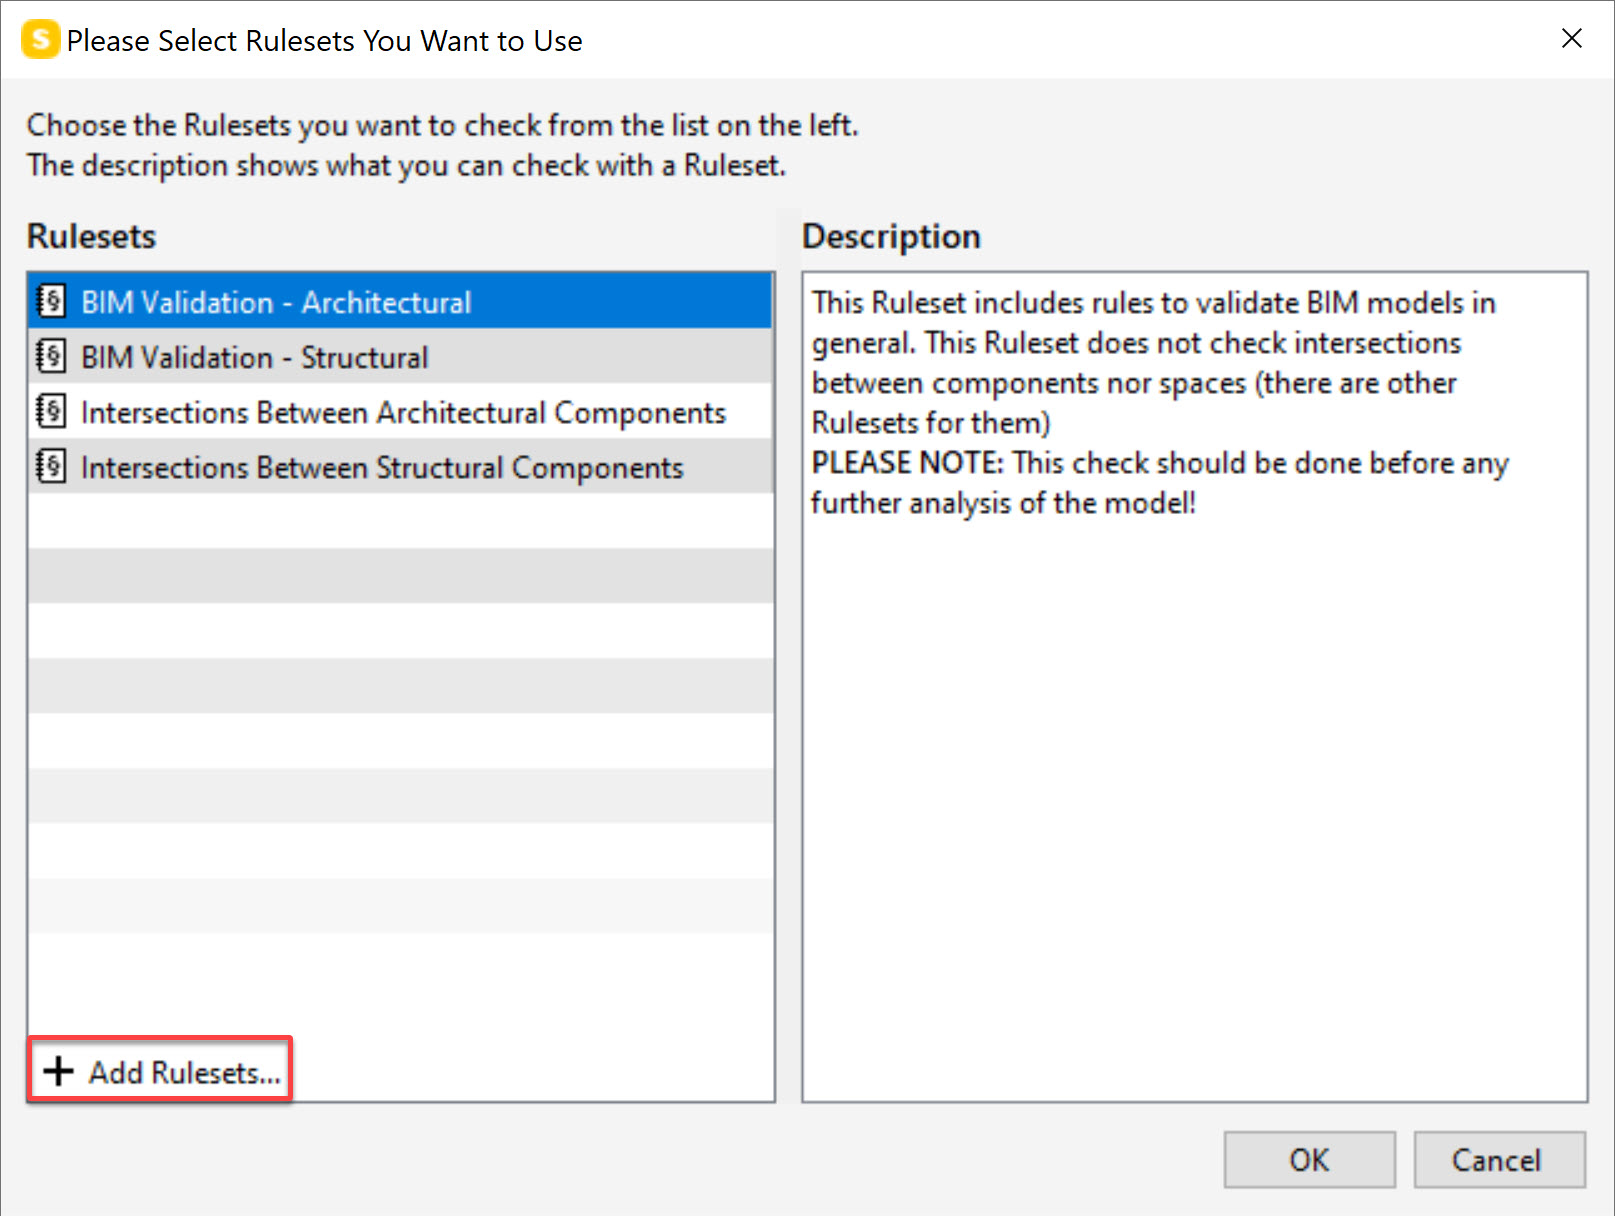
To load a ruleset which is not defined in the current role, click Add Rulesets:
-
A dialog opens. Navigate to the Example Rules folder, located in:
Windows: c:\Users\Public\Solibri\Solibri\Rulesets\Example Rules
MacOS: Applications/Solibri/Rulesets/Example Rules
Select the ruleset #230 Property Rule Template with Component Filters. Click Open and then OK to close the dialog.
Click Check Model. To ignore the to-do list task, click Check Anyway.
-
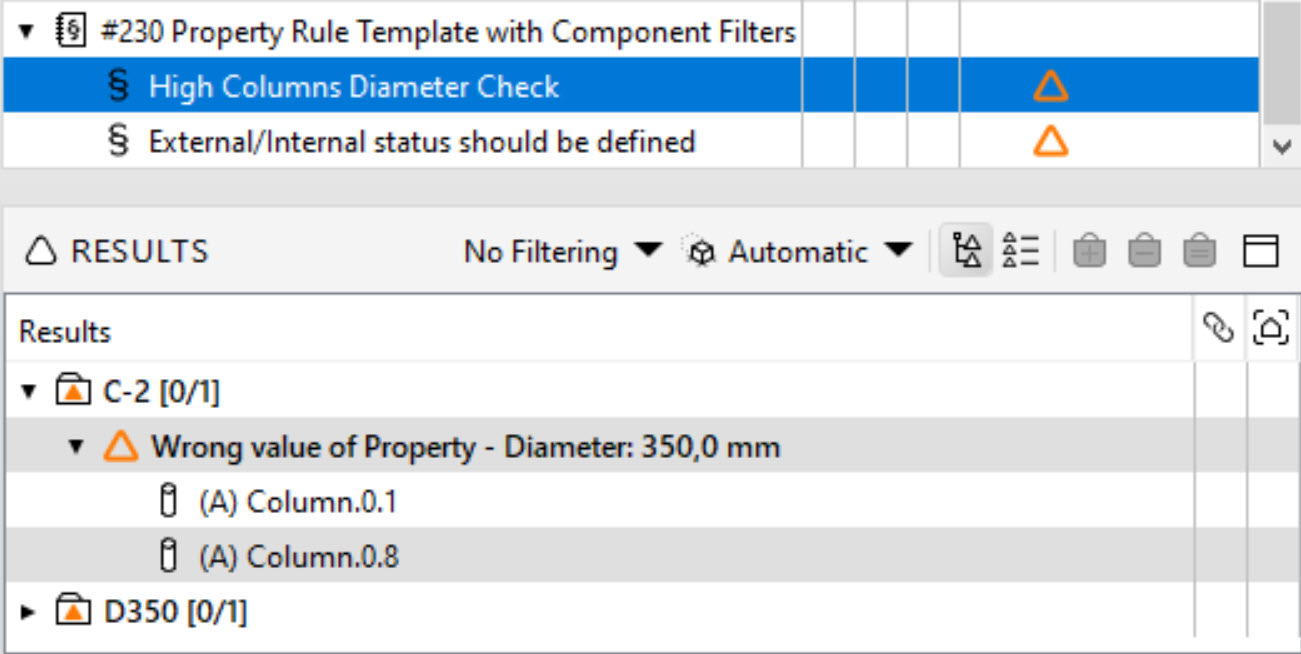
Two property-based rule examples are created. One that checks that all columns that are over 5m in length are at least 400mm in diameter:
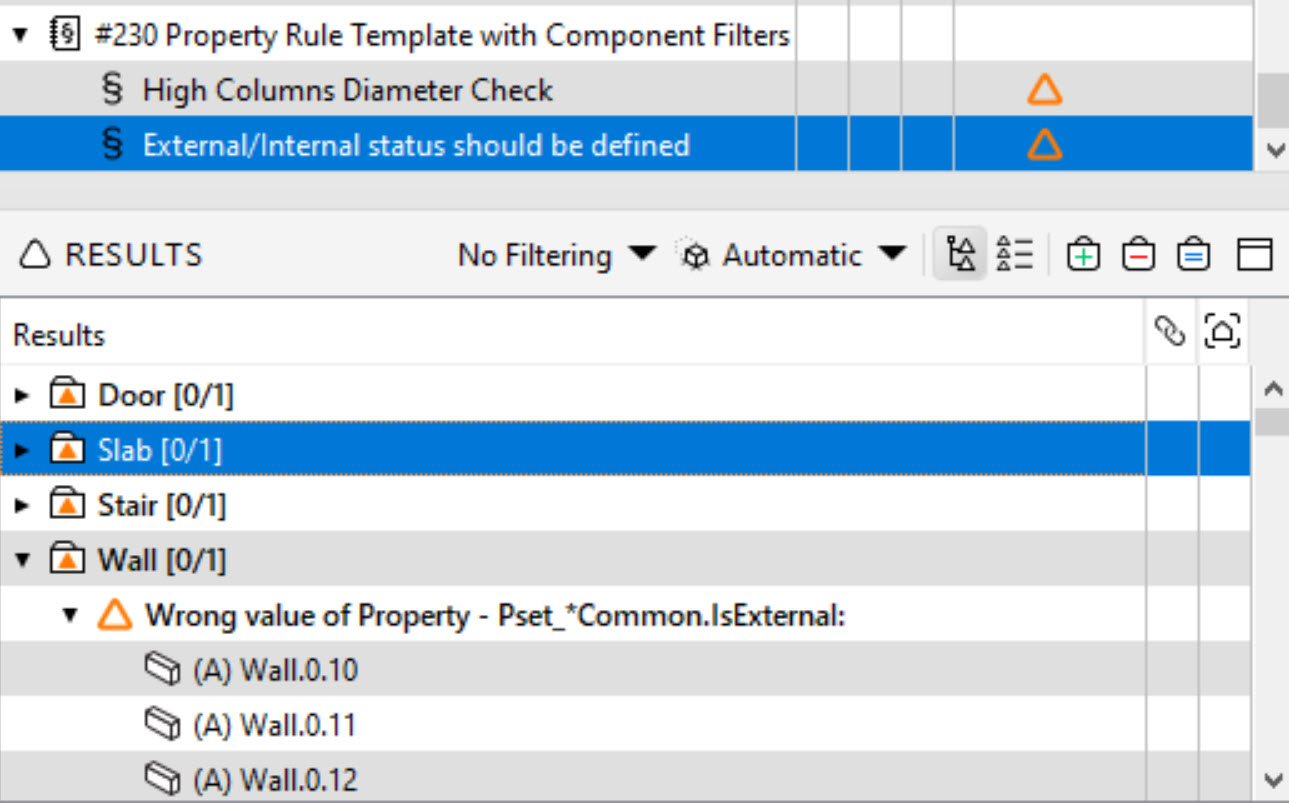
The other checks that all walls, curtain walls, slabs, stairs, doors and windows have their associated pset_*common parameter IsExternal defined:
We'll use this ruleset as a starting point for adding additional rules into the ruleset you created in the first tutorial.
Next, you need to modify your previously created ruleset in the Ruleset Manager and add additional rules to it:
Open the Ruleset Manager.
-
In the Ruleset Folders view, open the folder Rulesets open in Solibri and select the #230 Property Rule Template with Component filters ruleset.
Important
The same ruleset is available in the Example Rules folder. Although you can edit this version directly in the Workspace view, it’s not connected to the current model, forcing you to overwrite the saved ruleset file and reloading this in the Checking view prior to checking, and reviewing the changes within a model.
In the Workspace view, click
 to open the ruleset for editing.
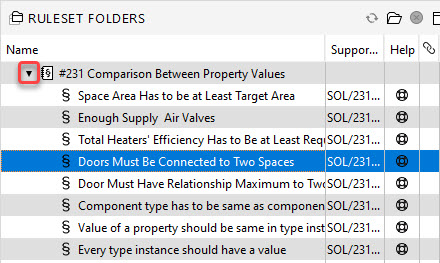
In the Ruleset Folders view, open the Example Rules folder and navigate to the rule #231 - Comparison Between Property Values. This rule template is used to compare property values in the same component or different components using the objects relationships.
-
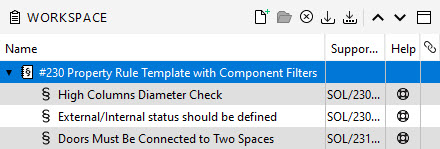
Open the arrow to the left of the ruleset and then select the rule Doors Must Be Connected to Two Spaces:
-
Drag and drop this selected rule into our ruleset in the Workspace view at the top level. This procedure allows you to access previously created rules and reuse them in other rulesets or as a starting point for similar required rules.
Tip
Ruleset folders can allow access to rulesets created in other locations by loading the containing folder. However, all resources should be created in a consistent location (i.e. resource root path), so that they can be used correctly in the creation of roles. We will introduce the creation of roles in the next tutorial.
-
Select the Doors Must Be Connected to Two Spaces rule in the Workspace view. From the Parameters view, we can see that the rule:
-
checks doors

-
sets a numerical comparison value of 2 against the number of compared components,, i.e. related IFC spaces


-
and ensures that the count is equal to that of the stored comparison value.

-
-
In the Compared Components relation, set the Direction value to Either :
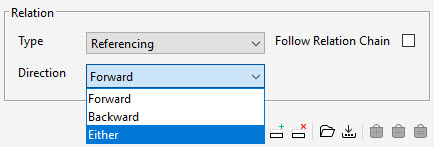
This rule will then fail for any doors that do not have a connection to two spaces.
Now that we’ve edited this ruleset, rename the ruleset from 230 Property rule template with component filters to My Second Ruleset, as it contains not only rules from rule template 230, but also from 231. To rename the ruleset, select it in the Workspace view and edit the name in the Info view.
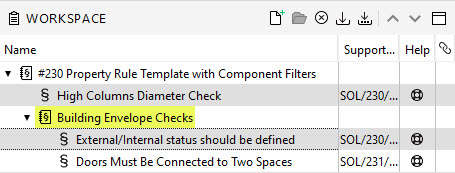
To help organise rules into subgroups, you can add an additional folder under the ruleset. Select My Second Ruleset and click
 . Rename this to Building Envelope Checks.
-
Drag both the External/Internal Status Should Be Defined and Doors Must Be Connected to Two Spaces rules into this new subfolder:
Tip
You can move the position of rules and ruleset folders using the arrow icons in the Workspace view toolbar:

-
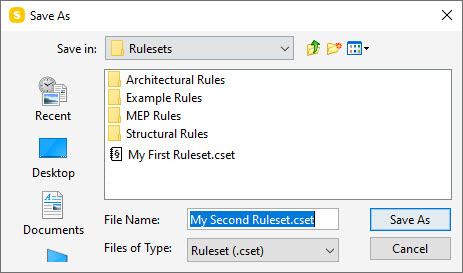
To save the ruleset, click
 . Save the ruleset under the Rulesets subfolder and rename it to My Second Ruleset to mimic the name added in the Info view, otherwise the ruleset will adopt the original ruleset name:
Now, you can test how the edited ruleset works:
-
Return to the Checking layout. In the Checking view, you now have your first and second rulesets:
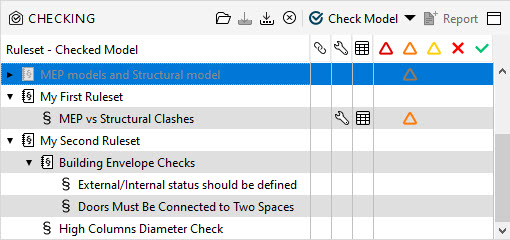
Click Check Model. Close the to-do list, if it appears.
-
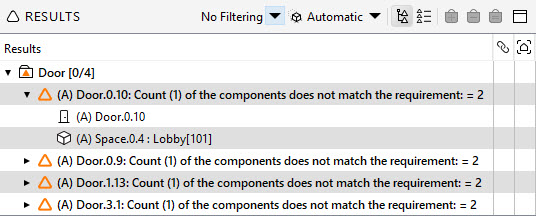
The rule we’ve just added shows failures for the doors that have a connection to only one space. At a summary level, the results show four issues. Selecting one of the issues shows that the requirement of "2" is not matched:
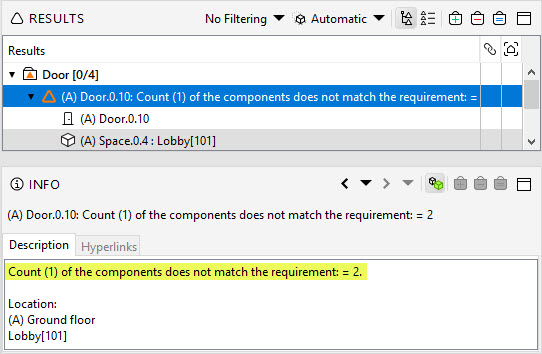
The info for the individual issue informs the user about the actual count number, in this case "1":
Go to the File menu and save your project.
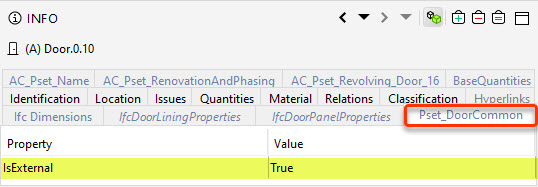
Subsequent rules could check if these failed doors have a pset_doorCommon ‘Is external” Boolean parameter value that equals "true":
 |
These rules can be used to ensure that designers are correctly tagging the right building types with their internal or external location. We will look at this functionality in Part 4, improving both rulesets you have created.
You have now completed the second part of this tutorial series. In the next part, you'll learn more about roles and resources in Solibri.